special offers
How to Clean Swamp Cooler Pads
It’s springtime, and you’re ready for the soothing breeze from your swamp cooler. But is your cooler ready? Are the pads clean? Will they stink?
If you are the proud owner of a Mastercool or Aerocool, you know that your swamp cooler pads don’t have to be changed every year. However, they do need to be cleaned every year when you first turn on your swamp cooler.
Should I clean my swamp cooler pads myself?
Before we get into the nitty-gritty details of how to clean your swamp cooler pads, let’s answer one important question: Can I clean the pads myself?
We’re going to answer that question with a few questions of our own:
- Are you capable of (and comfortable) climbing a ladder to access your swamp cooler?
- Do you have basic DIY skills and tools (like a ladder, screwdriver, garden hose, etc.)?
If you answered “no” to these questions, then we suggest you have an HVAC contractor (like ourselves) come out and clean the pads for you. It’s safer for you and your swamp cooler. While we’re there, we’ll also perform basic maintenance on your swamp cooler.
Check Out Our Convenient and Affordable
Preventive Maintenance Program
Now if your answer to the questions about capability, comfort, and tools was “yes,” keep reading! We’ll get into step-by-step instructions on why and how to clean your Mastercool pads.
Note: These instructions are for Mastercool pads only. Standard swamp coolers should have the pads replaced yearly. While it is okay to clean your Mastercool pads, we strongly suggest letting a professional do it to prevent damage.
Why cleaning your swamp cooler pads is important
Cleaning your swamp cooler pads is important for one major reason: hard water. If you’ve lived in New Mexico for any amount of time (and you don’t have a water softener), you’ve experienced the pain of hard water. Hard water contains dissolved rock, limestone, and other dissolved minerals like calcium, magnesium, and iron.
Remember, hard water’s not dangerous to your health. Unfortunately, it’s hard (see what we did there) on your home’s piping, fixtures, appliances, and of course, swamp coolers. The minerals in the water build up and harden on your swamp cooler pads. The buildup affects your cooler’s efficiency and can even cause a fish-like smell.
Cleaning your pads annually helps manage this mineral buildup and removes other foreign matter, like cottonwood seeds. This makes the pads last longer and improves efficiency (which we all want when it’s 99 outside).
Pro Tip: A water softener is a really good idea if you have a Mastercool swamp cooler. When the water is soft, your pads are more likely to last the full 3-5 years. If you don’t have a water softener, your pads will most likely need to replaced every year, which is a bummer.
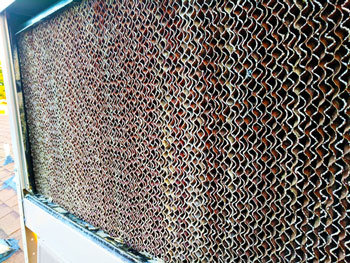
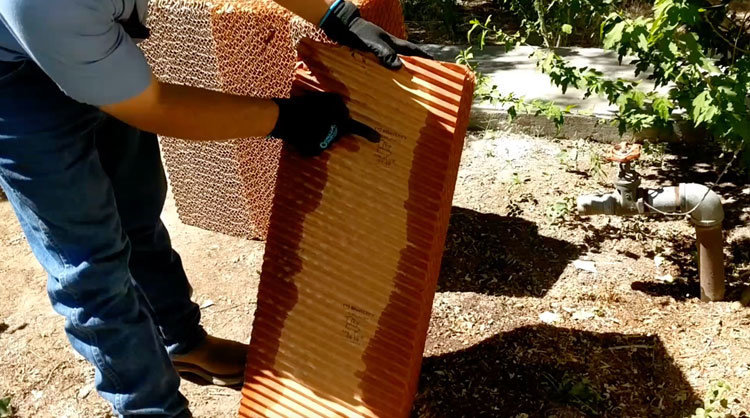
This Mastercool pad is about a year old and has a small amount of hard water build-up along the edges. This pad could use a good wash before going back into your swamp cooler for further use.
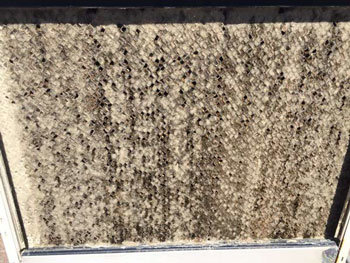
This Mastercool pad needs to be replaced. Cleaning it won’t help because it has a lot of hard water build-up, and debris and is even starting to mold in some areas.
Directions on how to clean your swamp cooler pads
Below are step-by-step instructions on how to clean your swamp cooler pads. If at any point you run into a glitch or a problem, give us a call or Ask A Pro. Now let’s get to the good stuff.
Equipment you will need:
- Drill or Phillips-Head Screwdriver – You’ll need a drill or screwdriver to open the panels to get inside your swamp cooler.
- Protective Glasses – It’s always important to wear personal protective equipment (PPE). Grab some safety glasses or goggles from your local home improvement store to protect your eyes from debris.
- Gloves – Protect your hands and fingers from cuts or scratches. Also, remember that your swamp cooler is made of metal. It’s going to be very hot depending on the time of day.
- Ladder – The odds are that your swamp cooler is on the roof or perched high on the side of your house. Make sure to follow the safety instructions on your ladder, practice three points of connection (two hands, one foot or two feet, one hand) while climbing, and place it on a flat surface. Secure it so that the wind (or you) can’t knock it over by accident.
- Hose – Your good old garden hose should work. You’ll need it to properly spray down your swamp cooler pads.
- Flashlight – You may need a flashlight to see inside the unit to find the power outlets and unplug them.
If you’re feeling overwhelmed at this point, no sweat!
Step-by-step instructions
1. Choose a good day with nice weather
Take it from us, you want to do this on a nice day! Don’t try to clean your swamp cooler pads if it’s stormy or windy. Spring winds are a serious hazard in New Mexico, and if you’re on an elevated surface during stormy weather, lightning is a concern. Pick a calm, sunny day.

2. Access your swamp cooler
We already said this, but it bears repeating: secure your ladder! You’d be surprised how dangerous a simple ladder can be. Visit the American Ladder Institute for full instructions on ladder safety. If you’re at high risk of injury for any reason, we suggest you let a pro do it.

3. Disconnect the power to your swamp cooler
Now that you’re safely on the roof (and your ladder is secured so it doesn’t fall and strand you), it’s time to get to work! First things first, disconnect the power from the swamp cooler. You’ll probably have to take the panel off the side of your swamp cooler to gain access to the power outlet. Unplug the cords to both the pump and the motor. You’ll find the receptacles inside the unit. Use your flashlight if you can’t see them.
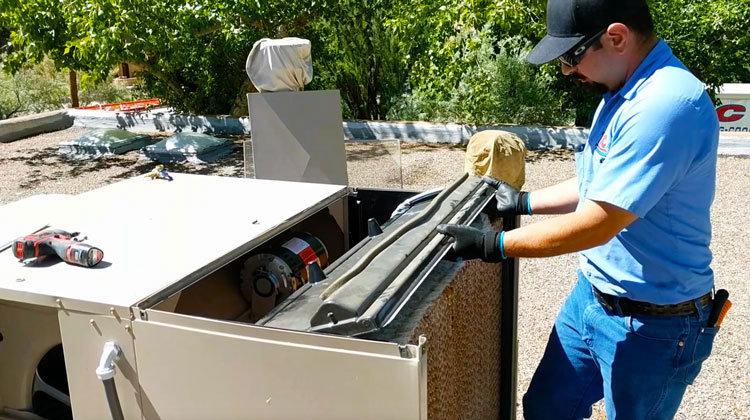
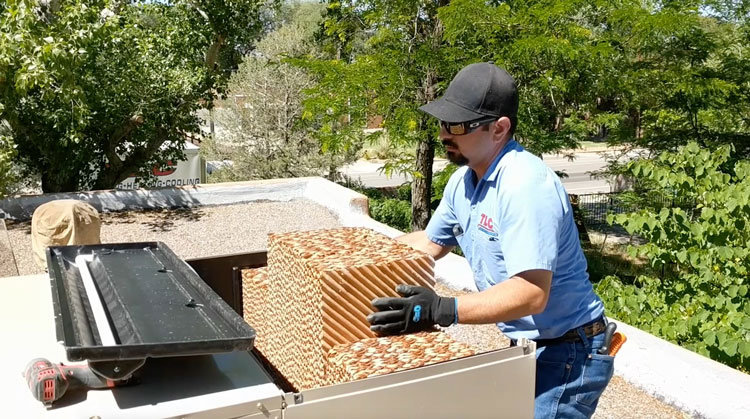
4. Remove the cooling pads
The next step is to get the pads out. They are located in the front part of the cooler with the mesh cover. You’ll need to unscrew the panel to slide out the front cover. Remove the top panel, which will pop right off after you’ve removed the front mesh covering.Once the pads are exposed, remove the water distribution tube section. It should be lying on top of the pads. This isn’t connected to anything, so just pick it up and set it off to the side. Be sure to put it in a safe place, especially if you’re on a slanted roof.Pro Tip: Your reflexes can get you in trouble. If something starts to slide off a slanted roof, your instinct will be to grab for it or chase it! That’s a good way to fall off the roof. Yell out a warning if anyone is below, but just let it go.
5. Check the pads’ condition
Once the pads are out of the cooler, inspect their condition. Ask these questions:
- Are the pads falling apart?
- Are the pads super heavy?
- Are the pads covered in crusty buildup?
If the answer to any of these questions is “yes,” then the hard water’s been at it. They are full of hard water build-up and need to be replaced. If the answer is “no,” transport your pads (safely, please) from the roof to the ground so you can wash them.
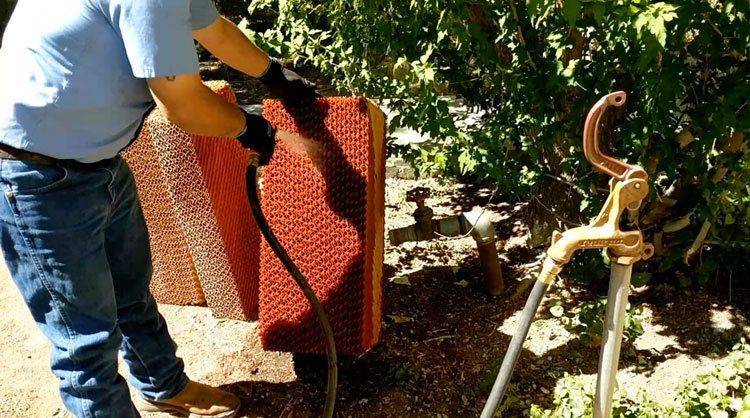
6. Clean the cooling pads
Now that you have the pads safely on the ground, let all your stress out by giving them a good shake, like a rug. This is a simple way to get rid of and loosen up the foreign material inside the pads.Before washing, look at the side of each pad for instructions that indicate which side is the front and which side is the back. You’ll begin by backwashing the pads. No, we’re not talking about when your toddler backwashes in your drink. This type of backwashing means you start from the back and go to the front.Grab your hose and tilt the pad at a downward angle. You’ll see slanted grooves on the sides to show you the pathways within each pad. This allows you to force the debris through the pad. Wash each pad thoroughly. If you are cleaning your pads and the calcium just won’t come off, it’s time for new ones.Once you’re done, transport your pads back up the ladder to the roof (again, be safe).
7. Place the pads back in the swamp cooler
Put the pads back in their place. Make sure to look at the pad instructions for “front” and “back” and put them in correctly. Once you’ve placed them, you can place the distribution tube back on top of the pads. (You know, the one that didn’t fall off the roof because you put it in a safe place…right?)Return the top metal panel, and put the mesh panel back in front. Screw the panels back together.
8. Plug it all back in
Plug both the swamp cooler motor and the pump back in. Place the metal panel covering back in place. Screw it in.And you’re done! Easy-peasy, right? You should pat yourself on the back, check “clean swamp cooler pads” off your honey-do list, and help yourself to some iced tea or lemonade.
Not excited about climbing on the roof? Hey, climbing on the roof is just another Tuesday for us. We’re happy to help you get your Mastecool up and running this spring. Request an appointment online or give us a call at 505-761-9644.